Saturday, March 6, 2010

Rear Brake Install:
I got the beautiful brakes from Hall Pantera. They were much better looking than the other vendor's and not that much more. The box came ripped but I am happy that I didn't lose any! Anyway, I got right to work and the rear brakes went on without issue. I also took this time to scrub the rims and tires in the rear. They look brand new! Check out the pictures here:

Photobucket Photobucket Photobucket Photobucket Photobucket Photobucket Photobucket Photobucket Photobucket Photobucket Photobucket


Clean up and Prep:
Before my new brakes arrived from Hall Pantera, I wanted to do some cleaning and prep. Nothing major, just some scrubbing and a little paint detail. I also painted the headers and exhaust. During this process, I found that one of my hardlines in the right rear was twisted! This line connects to this T fitting that is in a really tight place.. Luckily PI had a old hardline laying around. Anyway, the clean up made a big difference! Check it out:

Photobucket Photobucket Photobucket Photobucket Photobucket Photobucket Photobucket Photobucket Photobucket Photobucket Photobucket Photobucket Photobucket Photobucket Photobucket PhotobucketPhotobucket


Thursday, March 4, 2010

Suspension Work

I have got a lot done since my last post but I have been travelling a lot lately and haven’t had the chance to update the blog. I will cover the projects I have completed chronologically since the last post as seperate entries..

Suspension-Shocks:
While I awaited delivery of my second set of “new” brake calipers I decided that this would be a great time to remove the US spec spacers on the shocks. I took them down to my local good year dealer and they had a nice strut compressor. I own a shock compressor but the sprung energy really scares me. Anyway, here are some pics of the shocks

Here are the shocks BEFORE removal of the spacer:


Photobucket Photobucket

And here are the shocks AFTER removal of the spacer:
Photobucket

The front shocks also have spacers as well and here are the BEFORE pictures:

Photobucket

Here are the front shocks AFTER the spacer is removed:
Photobucket

Saturday, January 2, 2010

Rear Brakes: One Step Forward...Two Steps Back

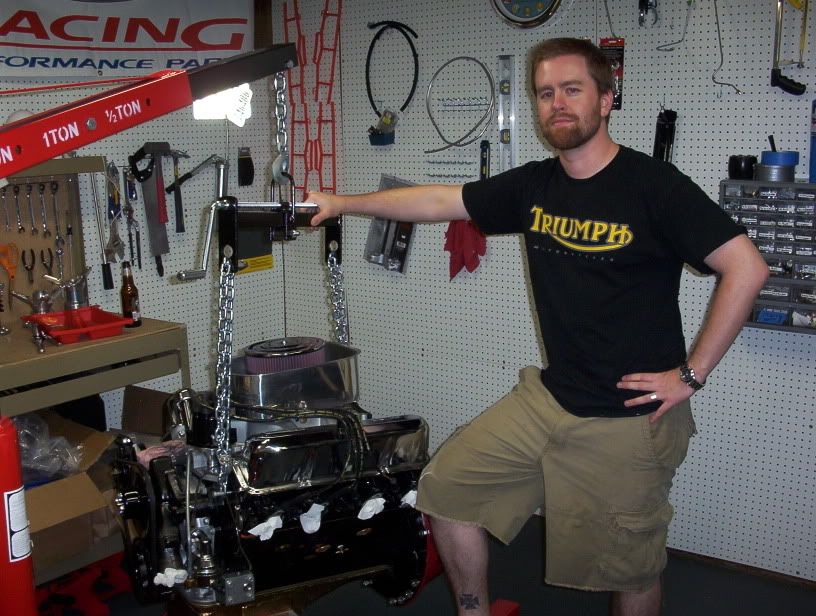
When I discovered that the brakes were frozen, I decided that I would go ahead and buy some new/used calipers instead of rebuilding the old ones. Since used sets from Pantera Performance were only $600+ I thought I would save myself some time. I figured just replacing calipers would be an easy job and I would be on the road in no time. And while I was at it; I was going to add some steel braided brake lines from the hard lines for better pedal feel. Let's just say my expectations were much higher than reality. Before I cover this post, I want to thank all the guys on the DeTomas Internet Community for all the help they gave me this week. Tons of great knowlege!
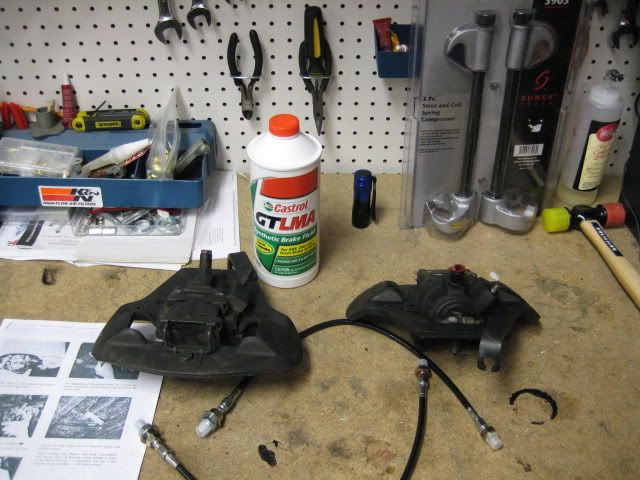
Let's start from the beginning. My first step was to organize and buy supplies. As I mentioned, I bought a full set of calipers from Pantera Performance. I also read my records and bought the same synthetic brake fluid as the previous owner as I figured I would basically flush the entire system while I was at it! I gathered all my parts for inventory and printed out some technical information to assist with the job:


Photobucket

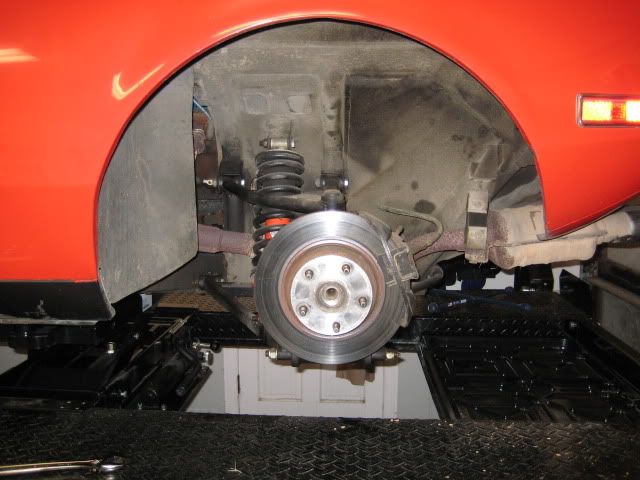
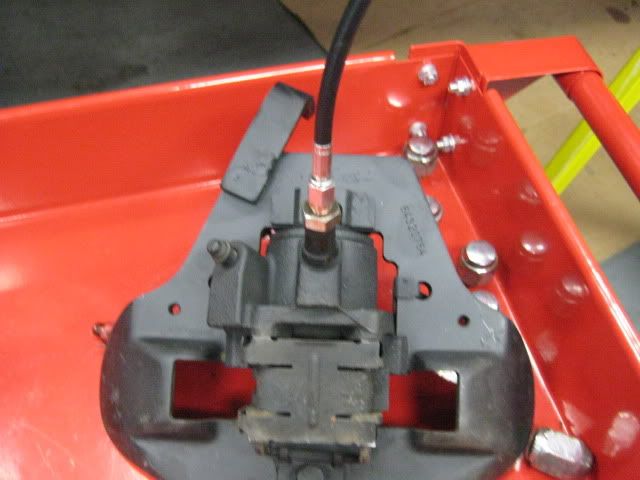
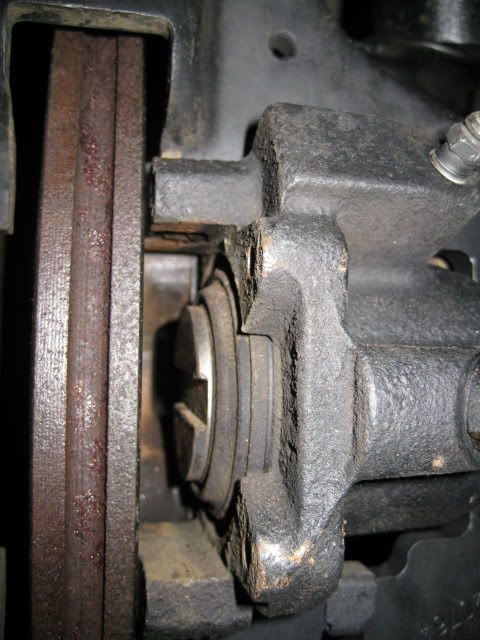
Next was removing the old caliper on the driver side. The caliper was completely frozen; it was almost like it was packed with mud??? I took some preemptive steps and used a lot of penetrating oil on different bolts, etc.


Photobucket


Photobucket


Photobucket


Photobucket

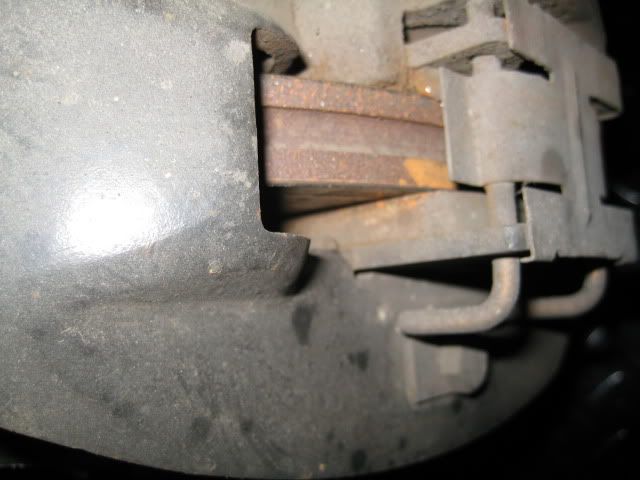
As you can see in the above picture, there is a lot of gunk that packed the brake pad in. I had to hit it with WD 40 just to get it loose!
The e-brake cable was tough to get off. I couldn't get enough slack in the cable to pull the cable out of the old caliper.

Photobucket

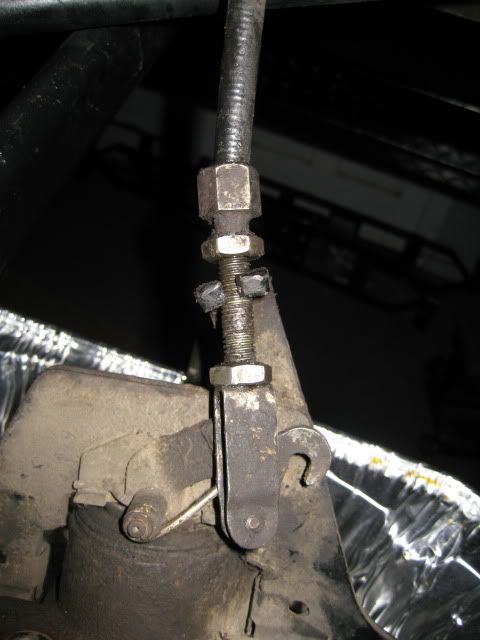
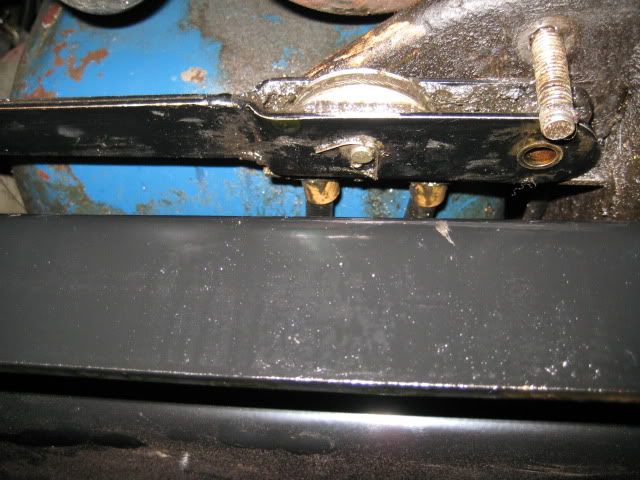
The only way I could get enough slack was to go underneath to where the e-brake handle interfaces with the pulley system that actuates both parking brakes on the rear calipers and remove it from it's mounting stud.

Photobucket

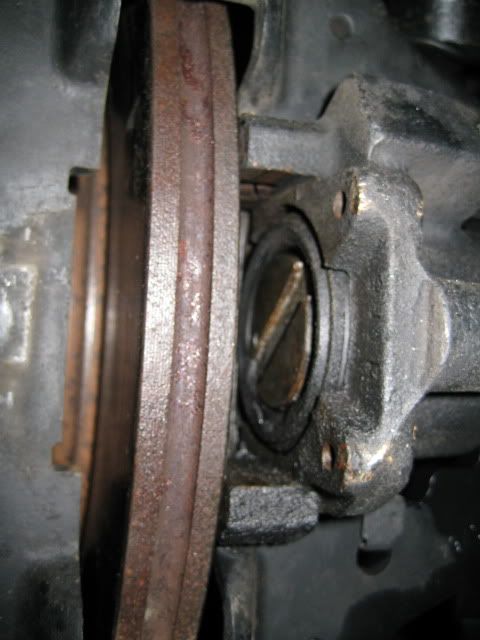
This allowed me to finally remove the caliper from the car!

Photobucket


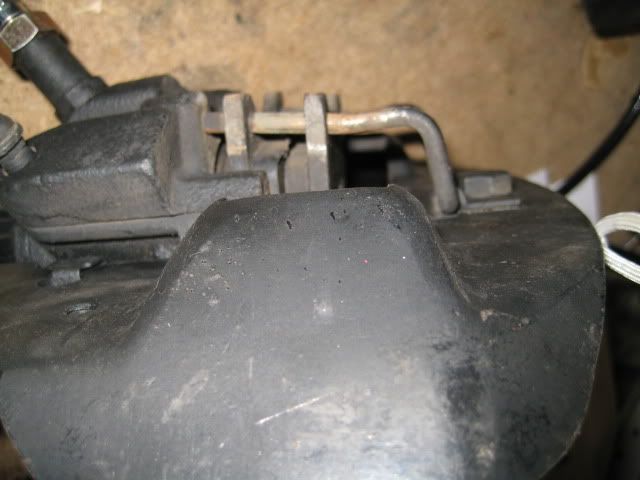
I then turned my attention to the "new/old" caliper. First thing I did was attach the new steel braided brake hose

Photobucket


Photobucket

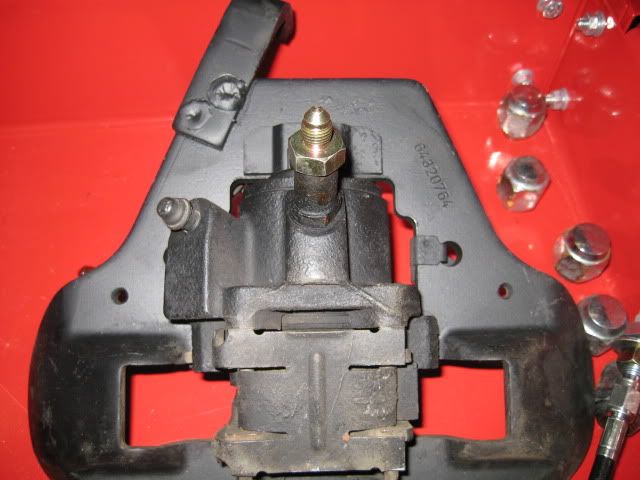
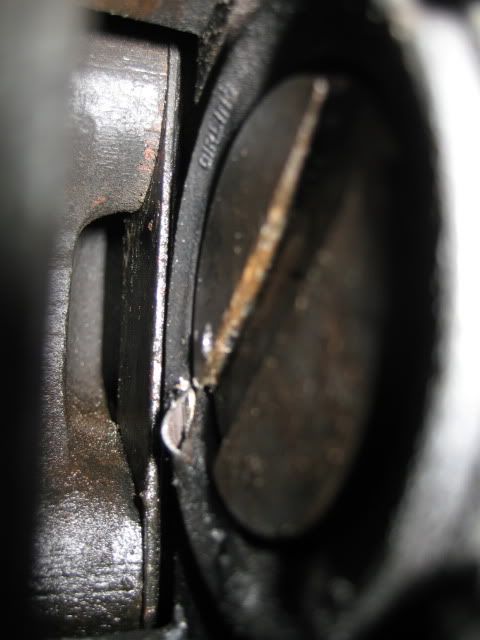
When I was about to fit the caliper to the car, I noticed something peculiar about the brake pad retaining pin....it was really bent!

Photobucket

At this point, I checked out my old caliper and noticed that my brake pad retaining pins were great and that I would just swap them. Here are comparison pics: First is the one from the part from Pantera Performance and the other one is off my car:

Photobucket


Photobucket

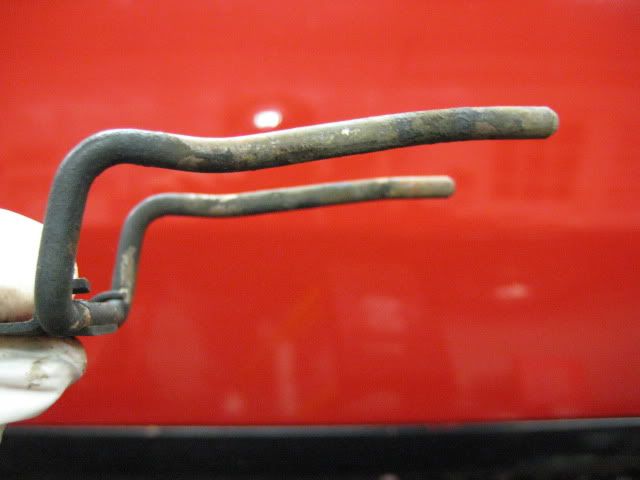
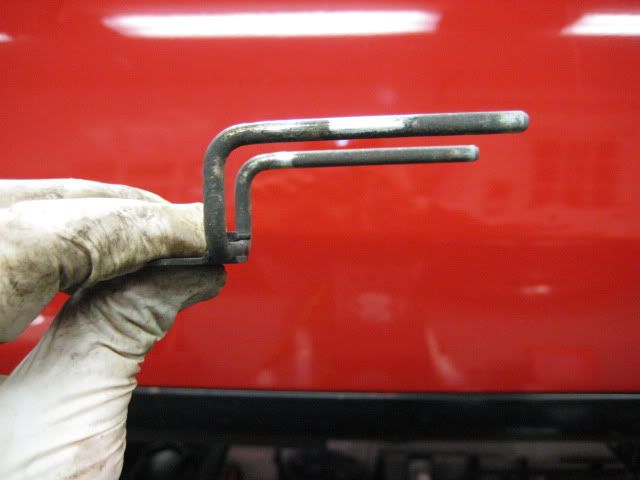
As you can see, the "new" set up wouldn't have worked at all. At least I can combine the two but for $600+ for calipers, I was expecting something in better shape (there are some other issues I haven't written about yet).

Anyway, I moved forward and mounted the "new" caliper with my retrofitted parts onto my car. I got the ebrake cable connected and now was time to fit the brake pads. As I tried to get the inner brake pad in, I noticed that the piston was too far out. I couldn't push the piston in but I found out that you have to rotate it 45* and then it will go in but that you have to then rotate the piston back to center when done.
Photobucket

I rotated the piston 45* from center using a screw driver and being careful not to scar the rotor. Once I did this, the piston went in! In fact, a little puff of dust came out of the bleed screw that I had opened.

Photobucket

But as I went to go and rotate the piston back to it's correct orientation, my screwdriver slipped and tore a hole in the outer brake seal :(

Photobucket

So what now? At first, I was swearing to high heaven! I just bought these brakes and they weren't really in that great of shape...maybe I should have just have bought a rebuild kit for mine! But no...I was in a hurry and I could just go ahead and buy some "new ones" and be moving on. Well first big lesson I am learning with the pantera that was different than building a kit car with new parts is that old is old....even if the parts are new to you. Also, you can't assume that the parts are good either. So...I ordered up a lot of manuals and I am going to go ahead and order that rebuild kit and I am going to go through all the calipers and rebuild them; inspecting them against the drawings and for any issues. What this means is that the cat will be in the cat house for a lot longer than I had thought. But at least I will learn a lot of stuff along the way!

Wednesday, December 23, 2009

Fuel Issue: Solved!
Mike had a great suggestion for me: put an in-line fuel filter in between the fuel tank and fuel pump. I put one in and guess what...the fuel supply has been supplied. Some gunk fell out when I removed the fuel line and I can already see gunk going into the fuel filter. Mike suggested that I replace the fuel filter in 500 miles and keep a spare in the car. As a result, I utilize worm drive clamps with thumb/wing nut style tighteners. Here it is in-line:


Photobucket

Next project is replacing all the brake calipers and bleeding the brake system...so I can get this cat on the road!

Wednesday, December 9, 2009

Fuel Issue: Tank to Pump

Mike Dailey came to my aid again with some great tips about chasing down the fuel problem. One area he said was inside the tank where there is a mesh sock that surrounds the pick-up. He said that this sock can get nasty and clog the pick up. You can test this by seeing if any fuel comes out of the line that leads from the tank to the fuel pump.

So first, I put the car high in the air:

Photobucket

I then proceeded to remove the fuel supply line hose from the pump:

Photobucket

Luckily, I planned ahead and wore face hugging googles... Why you asked? As soon as the line was off, I got a face full of gasoline! But hey....at least I know I don't have an issue inside the tank which would have sucked as you have to remove the motor to get the tank out :[

So now the problem is either the fuel pump, the fuel filter or one of Mike's other suggestions, a filter inside the carb. More to come

Tuesday, December 8, 2009

Pantera Project Launch! On with the fun!
I have finished my cobra kit car project finally and I am ready to sink my teeth into the Pantera (hopefully it won't bite back). The first project I was going to tackle was the frozen brake calipers. I wanted the car on the lift so that I could work comfortably and use the new hyrdaulic lift jack that I bought (works awesome BTW). I ran into a little problem. The car wouldn't start. The engine was turning over and I was getting spark so that must mean I have a fuel delivery problem. Oh joy! Just to make sure, I poured a little gas in the carb to make sure and she started right up. So now I just have to chase down the issue. I figured I would start from the top down. First thing I figured is that I had a stuck needle. So I used some carb cleaner, got out my soft mallet and banged on top of the carb float bowls. Very scientific! I then poured some gas into my "Hawt Sawce" bottle (just a BBQ/Catsup squirter) so that I could easily pour gas down the vent tube of the carb to fill the bowls.

Photobucket Photobucket

Once full, I could hear that gas was being squirted when I acctuated the accelerator linkage on the side of the carb. As a result, I figured that their was an issue farther down the line.

I took pictures of the fuel filter (think there is only one) and it looks dry!

Photobucket

I am going to change the fuel filter but if that is OK, then I either have a bad fuel pump (which is weird as it looks new) OR I have a plugged line somewhere....which could be a fun (read not so fun) project...but let's not get ahead of ourselves!


At this point I figured I could fill up the float bowls and drive the car up onto the lift so that I could lcomplete the diagnosis....filling the fuel bowls up when/if I ran out of gas. Worked like a charm. Now the snake (aka the cobra) has traded places with the Panther (aka pantera) on the lift:

Photobucket Photobucket

I am not sure if I will tackly my list serially or jump on other projects as I get stumped. I'll probably jump around while the grey matter works on particular problems or I wait for parts. Either way, I'll be making updates here. If you read my cobra blog, I'll most likely follow a similar M.O.